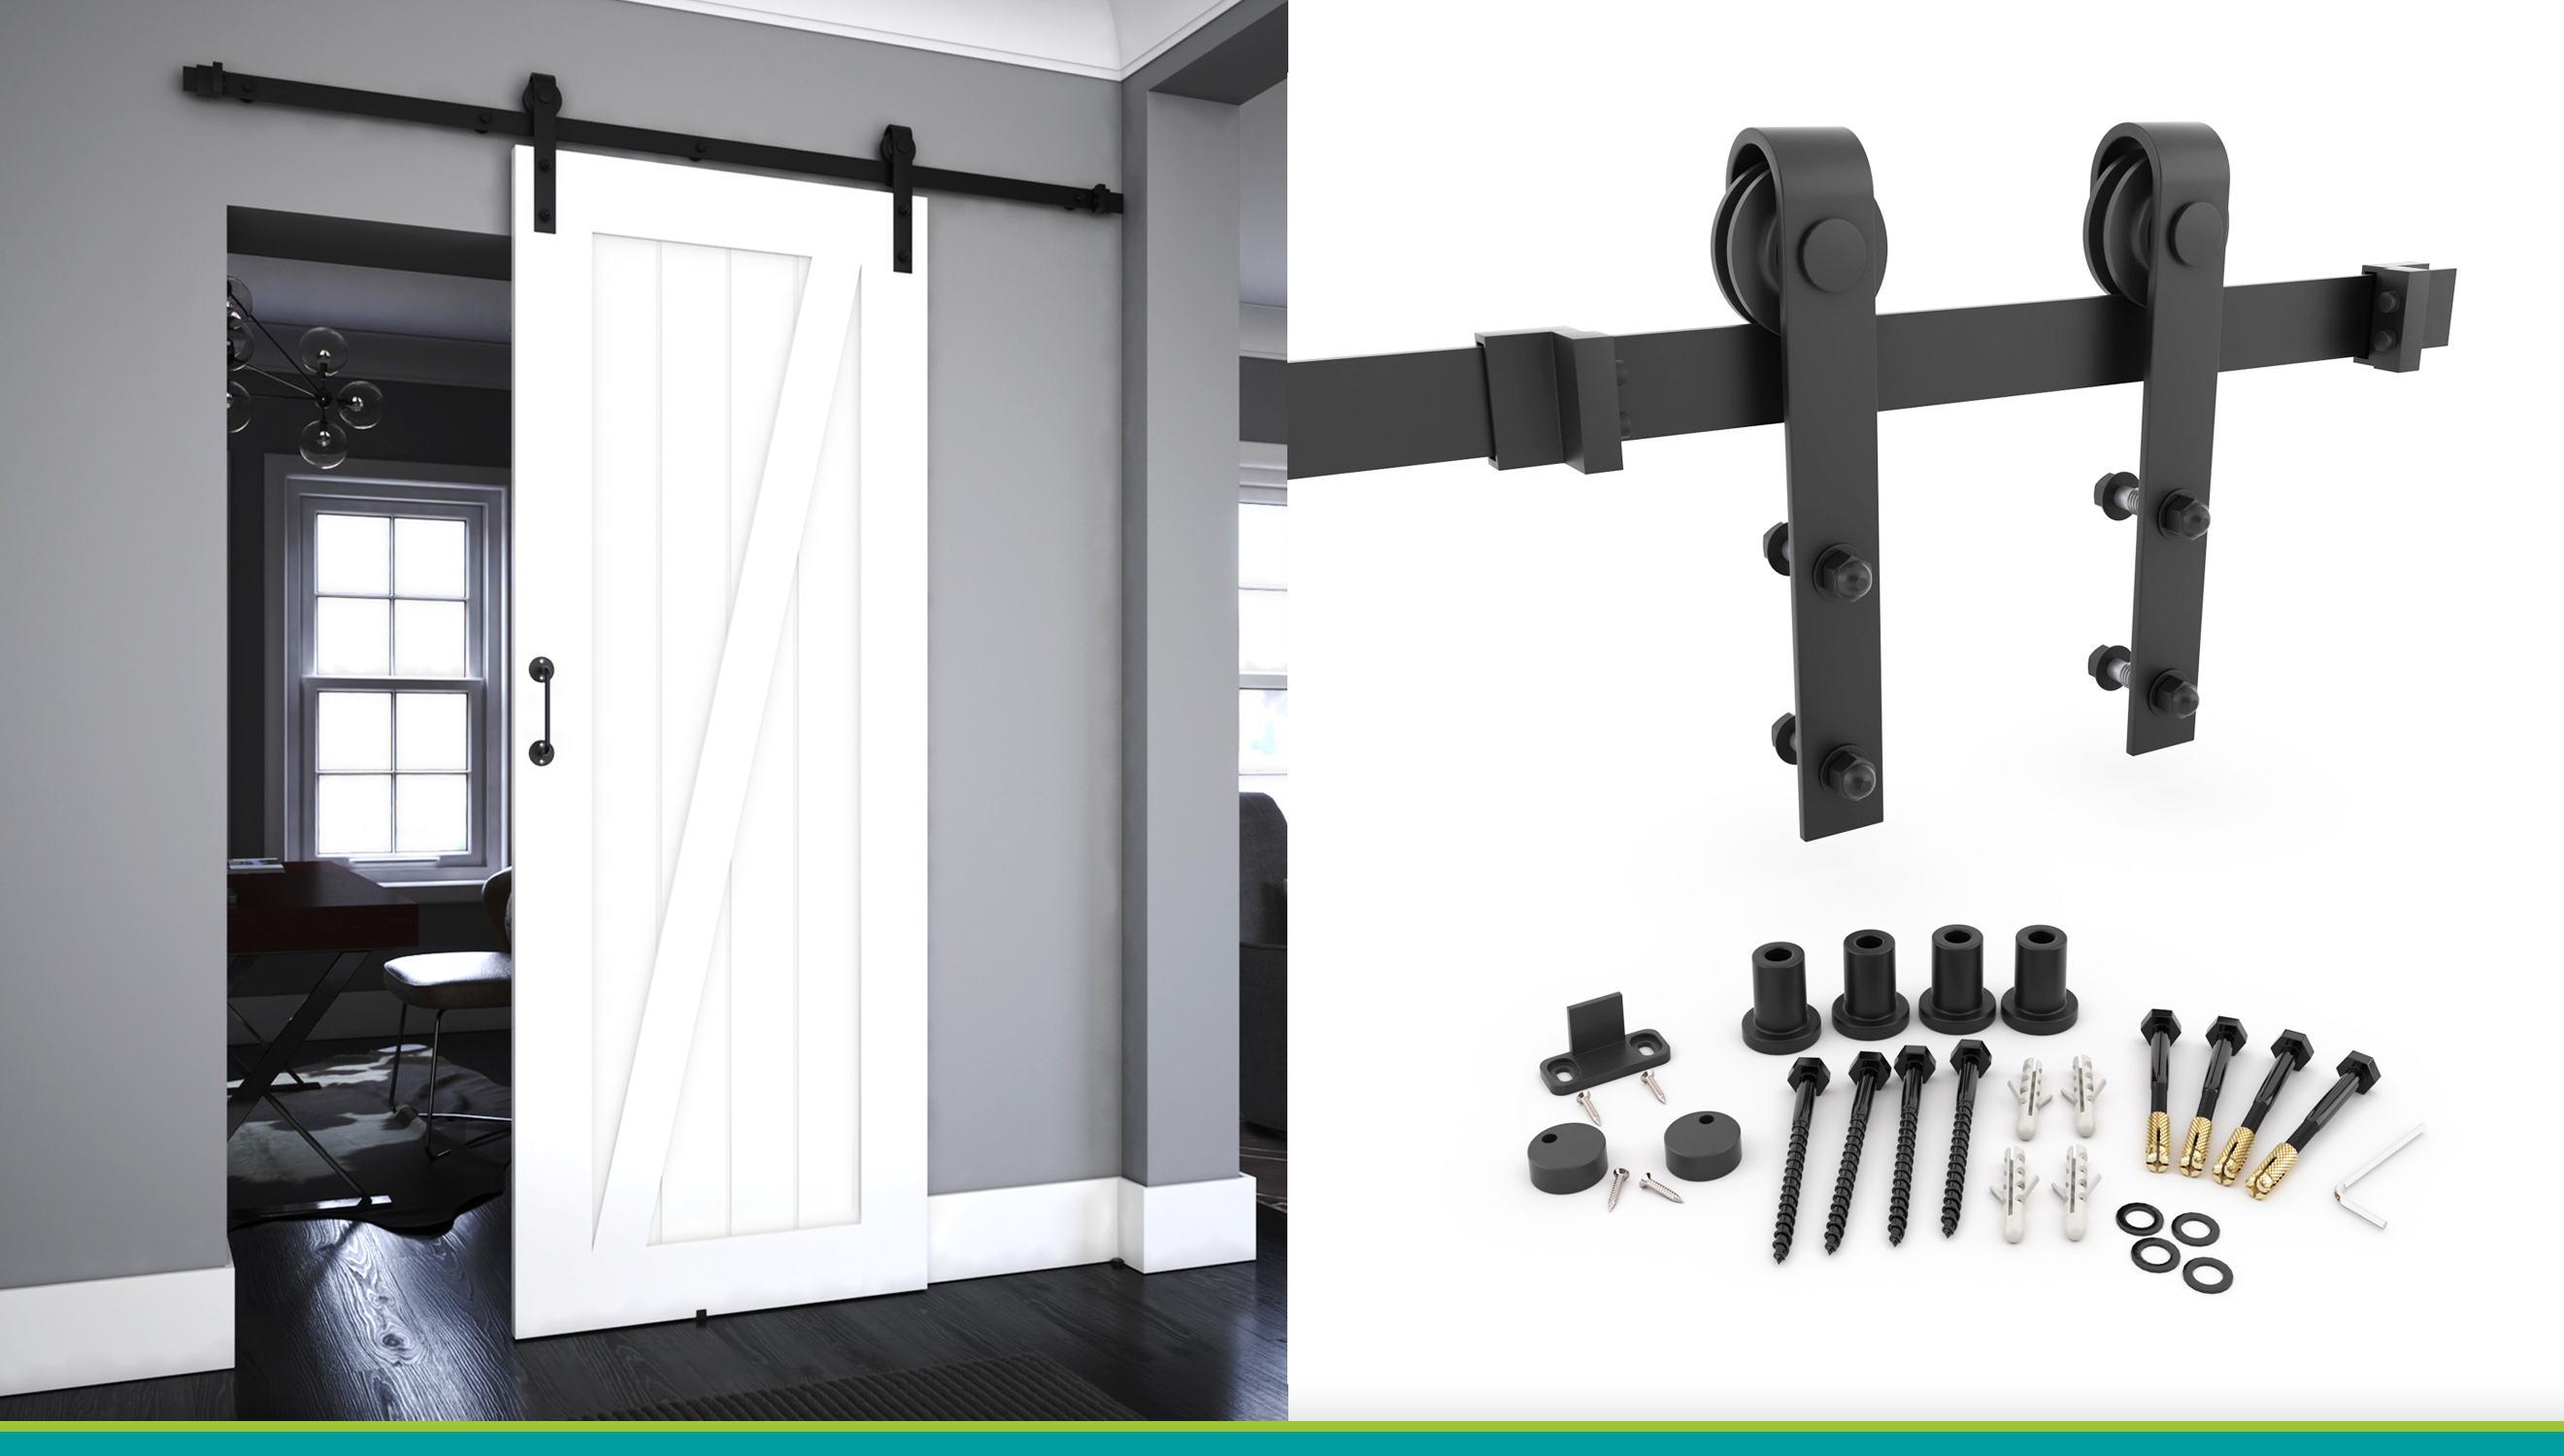
Buying a new barn door and unsure of how to install it? We have the solution! When you buy one of our slab doors, you can turn it into a barn door with this hardware kit.
Be it in the city or on the farm, the space saving barn door provides an elegant, countryside feel. Barn doors have been a functional but aesthetically pleasing product for ages — we think it will continue to feel this way for many years to come, especially when considering its stylistic versatility. Barn doors are the champions of country, traditional and modern interior schemes alike.
Beyond just looking good, there are many great reasons why a barn door would make a lovely addition to your home!
You can’t have the barndoor aesthetic without the hardware! EightDoors’ 72-in. Matte Black Barn Door Hardware Kit gives a chic look to your home while helping you optimize space.
With a 72” track, our durable steel hardware kit can support a single door that weighs up to 330 pounds and is 1 ⅜” thick. This kit is ideal for openings that are no bigger than 36” wide.
All of the mounting hardware is included, so you don’t need to take any extra trips to the hardware store! Please note that the door and handle are not included in the kit and that this product is intended for interior use only.
The pre-drilled track will save you a lot of time. We provide easy installation instructions and a one-year limited warranty, so you can rest easy.
The bearing wheels are representative of our quality craftsmanship; they quietly and smoothly roll along the track. Anti-jump discs prevent the hanger wheels from falling off the track, so you never have to worry about your door jumping off!
No matter what color your door is, the matte black finish will certainly stand out. Industrial, modern, farmhouse chic, scandinavian and minimalist styles will all be complemented by the black matte color.
The kit includes 2 hangers, 1 pre-drilled track, 2 door stops, 1 floor guide, 2 anti-jump discs, 4 wall spacers, left and right stops, an allen wrench, bolts, nuts and washers. This is all the hardware you need to hang a single door! You will need to gather some tools, like a wrench, screw driver, pencil, level, measuring tape, drill,a ⅜” drill bit and a ¼” drill bit.
Comb through our instruction manual so you can see how simple the installation of our hardware kit is.
Assembly Instructions
Step 1: Mount Backer Board
The track system that allows the door to slide open will need to be mounted on a backer board for added security. This isn’t included in the kit.
A 1×4 or 1×6 board of solid wood that is the same length as the door’s track should do the trick. Before mounting, paint the backer board your desired color.
Make sure the board is attached to studs above the door opening to account for the heigh of the rollers. The track will be 1 ¾” above the top of the door frame. There must be ½” clearance between the door and the floor.
Make sure you measure twice before installing and make sure it is level!
Step 2: Install Hangers
Position hangers on front center of stile, (min. 2” from the edge of the door, equal on each side).
Mark holes & pre-drill 3/8” holes. Secure hangers.
Step 3: Mounting the track and install stops
Bust out your level; once you have double checked that the track is level on the backing board, install the track to the backing board.
Position center of the track by measuring up from the floor, the door’s height plus 1 ¾”. Use lag bolts to install the track into the wood header & wall. Use a wrench to secure the screws through the spacer.
Insert stops on either side of track, inside the first and last hole. Align spacers with the holes in the track.
Step 4: Install anti-jump discs
Position each anti-jump disc at least 1” from the edge of the hangers. Tighten slightly to secure in place.
Step 5: Hang the door
Place the assembled door onto the secured track. Tighten the anti-jump discs. Slide the door back and forth to ensure all parts are operating smoothly. Secure stops in desired positions with the allen wrench.
Step 6: Installing floor door guide (Optional)
If you plan on using the door guide, first mortise a groove 1⁄4” wide by 3⁄4” deep into the bottom center of the door’s edge.
Once the door is plumb, place the floor door guide inside the groove and line it up close to the door opening. Slide the door from open to close to insure it is in working order. Mark holes with a pencil. Pre-drill 1/4” holes. If mounting into a concrete floor, use the provided anchors.


